Hey guys, sorry I'm posting late. I had a lot to do!
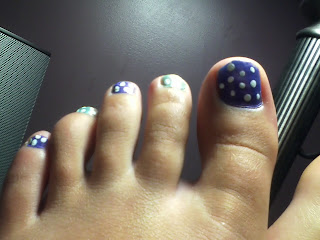
Well, anyways, I painted my toes with a little help from my mom, and got this design in the end....
This is before the design (both toes the same)
And after the design...I decided to do dots, and stripes!
What you need
- 1-4 Different colors of nail polish
(I decided to do 2 colors, you can do whatever you want)
- Clear Top Coat
(Help's make the nails look clean, shiny, and nice)
- White Paint
(This is for the designs)
- Very skinny paint brush
(You can also use a small wooden toothpick, anything you want)
Steps
(make sure nails are nail-polish free)
- Apply a clear coat on your nails (This helps make your nails look smoother with the paint)
- Apply your colors (1-4 colors, I used 2)
- Add a second coat of your color/s (It depends what you like, and what the color turns out like)
- Apply another clear coat (Helps dry, and make your nails look shiny)
- Add your designs.
Tips
- For polka-dots, it is best to use the end of the brush for more rounder looking dots.
- Let your nails dry! Don't start designs when they are still wet!
- Tip for "wet" nails-take your finger nail and gently put it on your toes, if you see a small mark from your finger nail, then you have to wait, your nails are not dry yet!
I hope this turns out good for you all!
Show me your pictures in the comments! :)
-kkrrbb78


1 comment:
Your toes are awesome Kayci!! :D Great post! It helped with my party so much! :'D
Post a Comment